1 The 7-Step Guide to Using Pressbooks
Pressbooks is a simple book publishing tool. Put your book content into Pressbooks.buffscreate.net, edit as you like, and create beautiful print books, ebooks, and webbooks simultaneously. This chapter will gives you a very quick overview of Pressbooks.buffscreate.net, which can be explored in more detail in the rest of this Guide.
The 7-Step Guide to Making a Book with Pressbooks
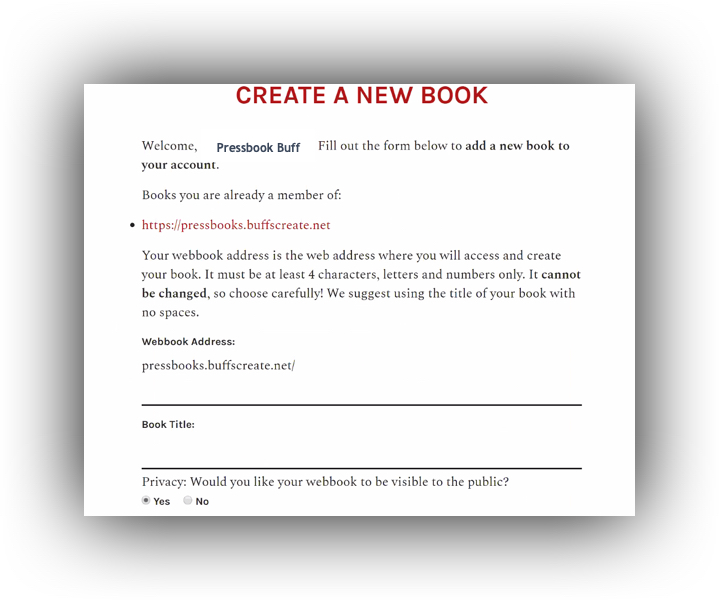
- Register for a Pressbooks.buffscreate.net account by going to https://pressbooks.buffscreate.net/home/. Login with your identikey user name and password.
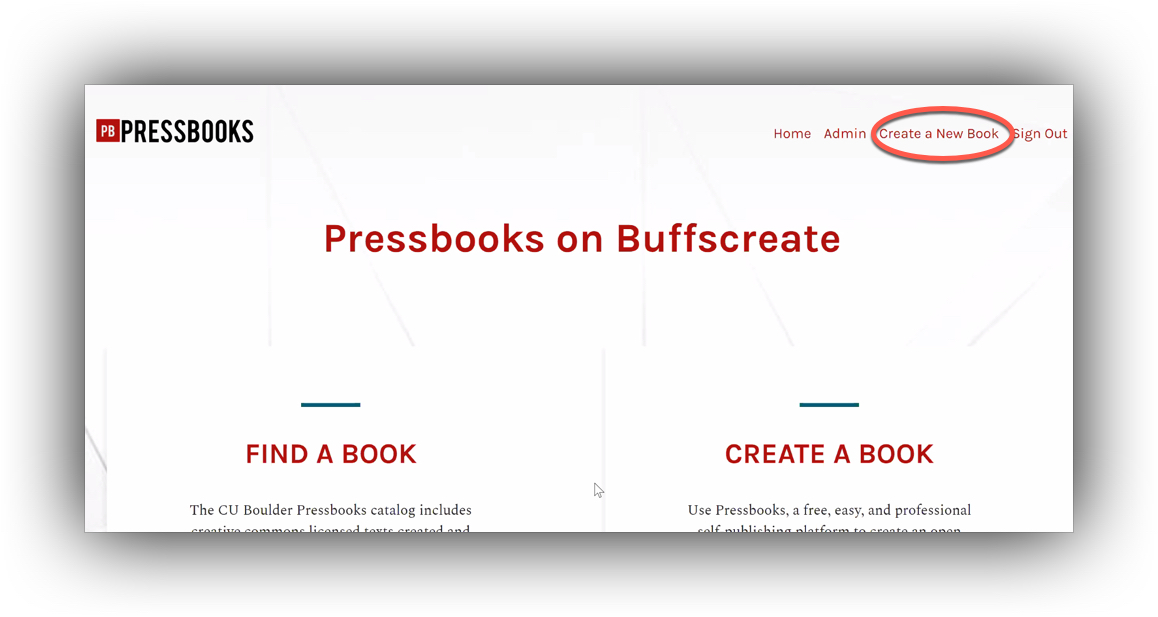
- Choose to create a new book. Upper right-hand menu.
- Add book information. This includes important elements like the author name, the title, and the copyright license, which can be assigned on the Book Info page.
- Add and Organize Text. Import your manuscript or add in your chapters, then structure the content on the Organize page.
- Choose your book’s theme. Themes are the design templates for your book, which you can select by going to Appearance > Themes.
- Export your book. Formats include MOBI (for Kindle), EPUB (for Nook, iBooks, and more), PDF (for print and print-on-demand), and webbook (which can be viewed immediately without export).
- Upload your book to CU Scholar.
The Longer 7-Step Guide to Making a Book with Pressbooks
STEP 1: Register your Account
By logging in with your identikey, you will establish an account.
STEP 2: Choose to create a book.
STEP 3: Add Book Information
The Book Info page is where you edit and add important information about your book, called metadata. This includes information such as: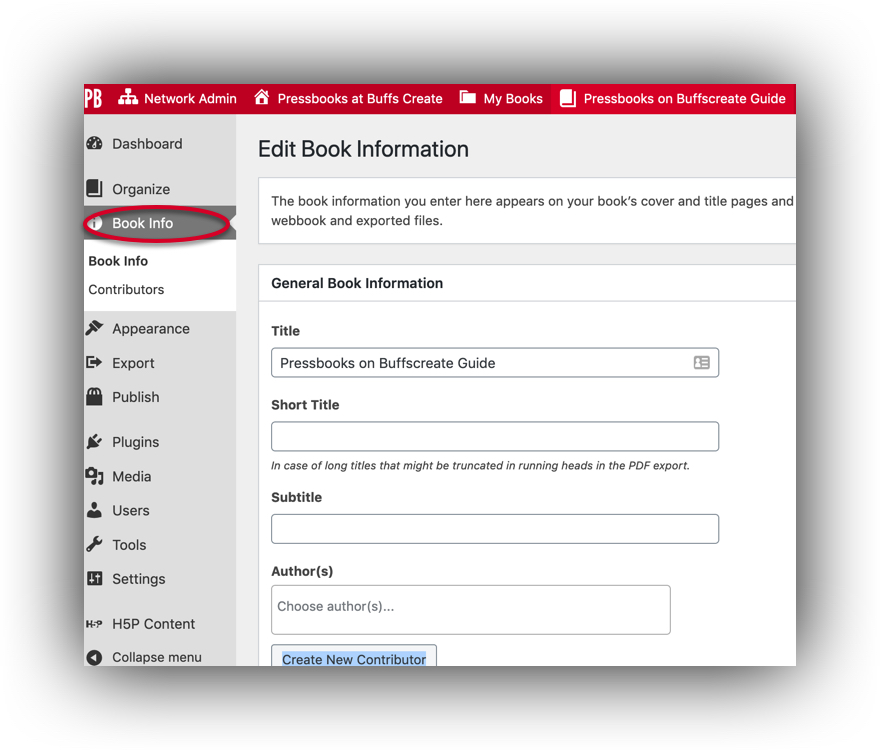
- Title
- Author name
- Publication date
- Publisher
- Copyright license and notice
- Ebook cover image
This list is far from exhaustive. Some information is necessary to add or edit, as we use it to automatically build integral parts of your book. This includes the book’s title and author name. Most other elements you can choose whether or not you’d like to add.
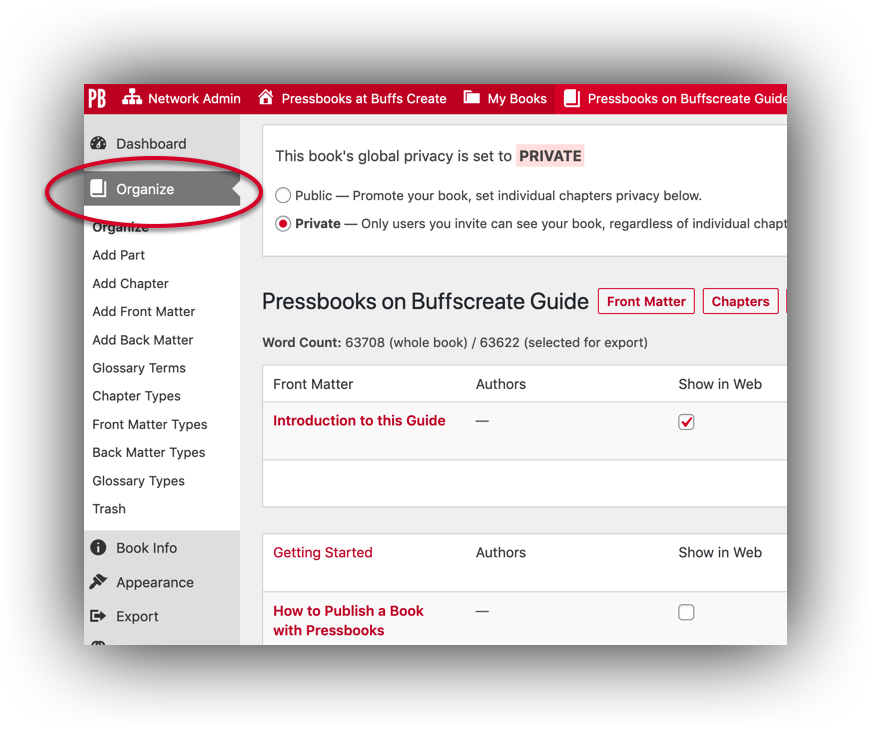
STEP 4: Add and Organize Your Text
You can add and organize your text from the Organize page, available from the left sidebar menu of your book’s dashboard.
This will be how you access all of your chapters and content in order to revise or create your text. You can reorganize chapters and parts of your page to change the layout of the book as well. You’ll see the three main parts of your book on this page:
Front Matter: Content in this section may include your introduction, foreword, dedication, and more. For more information on front matter, go to https://pressbooks.buffscreate.net/guide/chapter/front-matter/
Chapters: This is the main body of your book. The main body can be broken up into several distinct parts.
Back Matter: Content in this section may include your epilogue, author’s note, appendix, and more. For more information on back matter, go to https://pressbooks.buffscreate.net/guide/chapter/back-matter/
The Organize page is not the only place you can upload your text. For more information on how to bring content into Pressbooks, check out https://pressbooks.buffscreate.net/guide/chapter/how-to-get-your-book-into-pressbooks/
STEP 5: Choose Your Book Theme
Every Pressbooks.buffscreate.net user has access to 7 professionally designed book templates, which we call themes. The theme you choose governs the display of all of your exports, including PDF, ebook, and webbook. It determines the typeface of your text and the chapter title page design, among other features. The themes Pressbooks.buffscreate.net offers span a large range of genres, from textbooks and monographs to science fiction and romance. You can browse themes by going to Appearance > Themes.
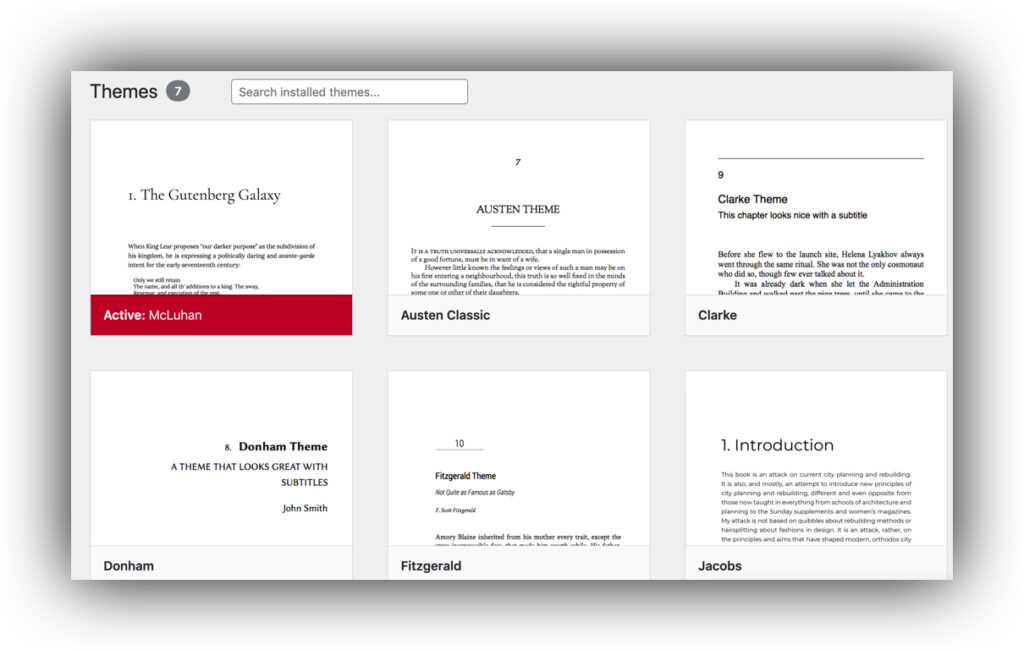
You can hover over any theme and click Theme Details to see information about that theme and its intended use.
Theme Options
Many of the other design elements of your book can be customized in your theme options after you’ve chosen which theme you’d like for your book. This includes elements such as page size, paragraph separation, and more.
The choices that you can make in your theme options are divided into four sections: Global Options, Web Options, PDF Options, and Ebook Options. Global theme options apply to all formats of your book and include elements such as table of contents display, language and script support, and chapter license display.
Each of the three other theme option sections apply changes to only one specific book format. This is because the web, PDF, and ebook versions of your book are created with three separate style sheets.
This enables you to, for example, have one paragraph separation for the web version of your book and another for the print version of your book, which can be an important accessibility consideration to make.
STEP 6: Export Your Book
You can export four of the five supported book formats Pressbooks.buffscreate.net creates from the Export page, which you can find on the left sidebar menu of your book’s dashboard. This includes
- Print PDF
- Digital PDF
- EPUB
- MOBI
The fifth supported book format is your Pressbooks webbook, which you can view by hovering over the title of your book on the top menu in Pressbooks.buffscreate.net, then clicking Visit Book.
You an also export several other experimental formats of your book. Note that Pressbooks.buffscreate.net does not provide technical support for any of the file types below:
- EPUB 3
- XHTML
- HTMLBook
- OpenDocument
- Pressbooks XML
- WordPress XML
STEP 7: Upload Your Book to CU Scholar
We strongly recommend that after you’ve exported your book that you add the item to CU Scholar. Depositing your files in CU Scholar will mean that your book is more widely discoverable, highlighted in our OER collection, and securely archived.
CU Scholar is an open access institutional repository supporting the research and teaching mission of the University of Colorado Boulder. It is intended to serve as a platform for preserving and providing public access to the research activities of members of the CU Boulder community. CU Scholar is maintained by the University Libraries.
1. Navigate to scholar.colorado.edu.
2. Click the blue Share Your Work button in the center of the homepage to add your work to CU Scholar.
3. Log in with your IdentiKey. You will be taken to the Federated Identity login screen.
4. Choose Add new work.
5. Select Book from the list of content types. Next, select Create Work.
6. Add Book Description. Complete all required fields, then select additional fields. Complete as many fields as relevant to you. We recommend adding the corresponding CC license as well as a link to the web book.
7. Upload files. Select the second tab and choose upload. Locate the files on your computer.
8. Read and agree to the deposit agreement. Select the check-box.
9. Save. Choose the blue Save button.
10. Send the Libraries OER leads an email so we can highlight your work in the CU Boulder OER Collection.
If you’d prefer, the Libraries OER Leads are happy to upload content on your behalf. Please contact us.
Prefer to watch and learn?
Check out these tutorials: http://bit.ly/PBbookformat
Media Attributions
- create
- bookdetails
- bookinfo
- organize
- themes
